 Kinah Ledger
Ferocious Horn Den guide
Three bosses and a totem room. Nuakum's black hole wipes parties that miss it.
- Prep
Before you go
Ferocious Horn Den · Party Dungeon- Level
- 45
- Item level
- 2,100
Entry by modeExploration Conquest Normal Conquest Hard Level 45 45 — Item level 2,100 2,100 — Party 1 to 5 1 to 5 — Bosses on the route 3 and the totem room 3 and the totem room — Final boss timer No enrage Enrage at 5:00 — Reward cube: 40 Odyle Energy in both modes
Know this first- Wait at the KibeliskBind there and pull Nuakum together
- Use the bombsAt the first barricade and on the totem stairs
- Take turns blockingEach block marks you, so the next is someone else's
- Claim before you leaveLeaving unclaimed costs 1 of 10 a week
- Weekly resetWednesday 07:00 UTC
Watch a full runAION 2 - The Ferocious Horn Den Expedition Guide | Conquest Difficulty · Player Ay · 22 Oct 2026Chosen by us. Plays on YouTube when you press it.
- 1Enter from the AbyssThe entrance is at Fera Surveillance Site.
- 2Run past the trashStop at the wooden barricade.
- 3Bomb the barricadeTake a bomb from the box in front of it.
Two orb checks. Pop the blue orbs on one side, then jump the ring.
Phase 1100 → 75% · Learn his markersA red marker lands on one player. Take it alone, away from the party. - Red markerTake it away from the partyRed circle on one player
- Charge and pounceStep out of the markerA line or circle shows first
- Purple orbsPop one, away from the partyPurple orbs home in, then stopOne source
Heads up · 75%Thunder CryHe can't be hit. Lightning falls and leaves blue orbs while a gauge counts down.
- 1Pick one side
- 2Pop every orb there
- 3Jump the ring
Orbs left on the floor explodeEach orb you pop slows youConquest: jump on the second howl
In Conquest he leaps to the middle and howls twice. A ring spreads out on the second howl.
Clear the orbs on one side, stand there, then jump the ring. Phase 275 → 25% · Same attacksHeads up · 25%Thunder Cry 2The same orb check again at about 25%.
- 1Pick one side
- 2Pop every orb there
- 3Jump the ring
Orbs left on the floor explode
Burn25 → 0% · Same attacks- 4Slope, wall, glideUp the slope, break the wall on the left, glide down.
- 5Everyone in the totem roomLatecomers are locked out once it starts.
- 6Wake the totem, clear the wavesTank and healer hold the middle. Damage dealers throw bombs from the side stairs.
- 7Break the totemOnly after every add is dead. It opens the door to Duanka.
Kill his souls with the altar orb, and run out when he pulls you in.
Phase 1100 → 75% · Learn his attacksTank in front, melee behind, ranged and healer spread out. - Shared holdStack on the held playerOne player held under a red circle
- Claw sweepStay behind himWide arc, short warning
- Staff circlesSpread so circles don't overlapCircles drop on playersOne source
Add · 75%SoulsFour tethered souls appear and a 15-second countdown starts.
- 1Ranged grabs the altar orb
- 2Kill all four souls
- 3Beat the 15-second timer
Souls left alive get absorbedHe heals and gains a damage stackNormal hits can't hurt themBack at about 50% and 15%
Exploration summons two souls, not four.
A ranged player takes the altar orb, then kills the four souls. Wipe check · 65%Soul CallerHe pulls everyone to the middle and an 8-second alert runs. Lightning souls close in.
- 1Run against the pull
- 2Dodge the lightning souls
- 3Get outside the big circle
Near the middle it one-shotsTouching a soul stuns youBack at about 30%
Run out past the outer ring, between the lightning souls. Phase 265 → 30% · Same attacks. Souls at 50%.Wipe check · 30%Soul Caller 2The same pull again at about 30%.
- 1Run against the pull
- 2Dodge the lightning souls
- 3Get outside the big circle
Souls return at 15%
Phase 330 → 0% · Same attacks. Souls at 15%.- 8Ride the updraftBack out of his room, then up. Nuakum's arena is below.
- 9Bind at the last KibeliskWait there for the whole party.
- 10Everyone in, then pullThe fight triggers easily. Anyone outside is locked out.
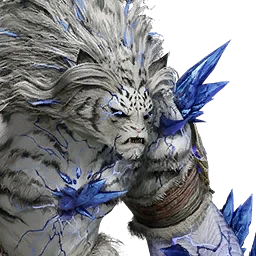 Stage 3 of 3 · Final boss
Ferocious Horn Nuakum
- Enrage
- 5:00 · Conquest only
- Black hole
- at 30%
A rooted player, a circle to stack in or leave, and a black hole that wipes the party.
Phase 1100 → 75% · Stay behind himTank faces him away. Everyone else behind, pools to the rim. - Frontal flurryStay behind himHands drag, then five claws
- Reach and pullGet behind him afterHe reaches out and pulls you in
- Bleed poolsDrop pools at the rimThird bleed stack ruptures
- ChargeStep out of the laneArrow lane on the floor
- PounceGet out of the circleCircle on his target, then a knockdown
Wipe check · 75%The HuntHe leaps out of reach and roots one player. A clone dashes at them.
- 1Block the clone's dash
- 2Read the red circle
- 3Arrows in: stack. Out: leave.
Small circle, arrows in: stack on themBig circle, arrows out: everyone else leavesEach block marks the blocker
Twice in a row at about 75%, three times at about 55%. The circle size is random.
One player steps in front of the clone. Then stack or leave. Phase 275 → 55% · Same attacksWipe check · 55%The Hunt 2Three roots in a row. A fresh blocker for each clone.
- 1Block the clone's dash
- 2Read the red circle
- 3Arrows in: stack. Out: leave.
Never block twiceThe same size can come twice
Phase 355 → 30% · Same attacksWipe check · 30%Black holeA glowing orb rises in the middle and a long cast starts. If it finishes, the room dies.
- 1Marked: run behind the orb
- 2Three throws must hit it
- 3Stand outside its burn
Cast completes: the party diesThree of his four throws must hit the orbBefore the third throw he fears the partyThe orb pulls you in and burns
The files call it Blue Light of Destruction. He marks a new player before each throw, sometimes the same one.
Marked player stands on the far side, so the orb takes the throw. Phase 430 → 15% · Same attacksHeads up · 15%Red ballsHe roots one player and throws a red ball at them twice. Timing varies, from about 20% to 10%.
- 1Two players step in
- 2One ball each
- 3Never the same player twice
A ball that lands kills the rooted playerA second hit on one player kills
Burn15 → 0%- Beat the timerKill him before 5:00Conquest only. Exploration has none.Normal only
- Finish
Claim the loot
The cube at the end- 11. Open the cubeIn the Howling Throne. Pays for each boss you killed.
Full clear: 400,000 Kina in ConquestNuakum armour drops only here
- If it goes wrong
If you wipe
- Missing the black holeFewer than three throws hit the orb
- Wrong Hunt callStaying in a big circle, or leaving a small one
- Caught by Soul CallerRun out, and don't touch a lightning soul
- Orbs left behindKwapo's blue orbs explode in big circles
- Starting too earlyThe totem room and Nuakum lock out latecomers
- Conquest enrage5 minutes on Nuakum
Players' runs
Clear times, Kinah and loot per run from players who run Ferocious Horn Den with the tracker on. They load here when JavaScript is on.
Monsters
Ferocious Horn Den loot
Everything its monsters and reward cubes drop, rarest first.
Unique 15
Legend 23
Rare 17
Common 17
Questions
How many bosses are in Ferocious Horn Den?
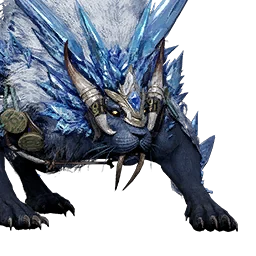
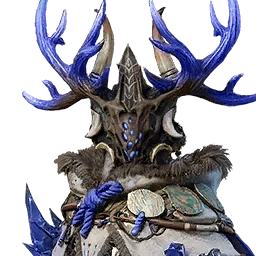
Three: Watchdog Kwapo, Necromancer Duanka and Ferocious Horn Nuakum, in that order. Between the first two is a totem room, which is a gate fight that drops nothing. The cube pays for each boss you killed.
What item level do you need for Ferocious Horn Den?
On the global servers both Exploration and Conquest need level 45 and item level 2,100, and up to 5 players can enter. A cube claim costs 40 Odyle Energy.
How do you beat Nuakum's black hole?
At about 30% a glowing orb appears in the middle. Whoever he marks runs to the far side of it, so his throw hits the orb instead of the room. Three of his four throws must hit it, or the cast kills the party.
Is there a Hard mode for Ferocious Horn Den on global?
Not yet. As of 23 October 2026 only Krao Cave and Draupnir have a Hard mode on the global servers. Ferocious Horn Den has Exploration and Conquest.
What does Ferocious Horn Den drop?
Nuakum's Unique armour set (only from him), Black Claw Epic gear, Fera Necklace from the mid-bosses, Silentium, Soul Codex, Enhance Stones and Kinah. Conquest adds Amplify Stone Fragments, Wrathful gear and Sealed Dark Veil Wings.
Sources. Written by Kinah Ledger in our own words, checked against Aion 2 Maps: Ferocious Horn Den boss guide, Aion 2 Maps: Expeditions and Odyle Energy, MetaBot: Ferocious Horn Den, games.gg: Ferocious Horn Den guide, Game8: Ferocious Horn Den, AllThings.how: Ferocious Horn Den, Player Ay (YouTube), NoBS Game Guides (YouTube). Boss art, entry rules and loot from the game files via MetaBot.GG. Global version, checked 23 October 2026. Report a mistake